Sharp edges in wood carving tools enhance your pleasure of carving. These are the most common ways to sharpen your wood carving tool. Sharp edges are also more durable and last longer than dull ones. Sharp edges make your tool easier to use. Sharp edges are easier to carve and provide the best cutting performance. Here are three methods for sharpening wood carving tools. Learn more. - How to sharpen a sharpening stones.
Sharp edges increase carving pleasure
Sharp tools will not only make carving easier, but sharp edges are essential. Sharp tools require less effort and provide more control during carving. Also, the smooth surface of a sharply cut blade leaves a silky-smooth cut. Sharp tools are essential for a successful carving project. To achieve best results, you should sharpen your carving tools frequently. Regular sharpening will keep them sharp and make your carving work much easier.
Sharp edges may enhance the enjoyment of carving, but can cause blisters. Wood's natural texture can be rough so regular handling will make the skin more resilient. However, calluses will eventually form from blisters. This process can be time-consuming and sometimes painful. If blisters are visible in your carving, you can change how you hold the tools. You may need to practice, but it will pay off in the end.
Use a sharpening knife and a fine grain stone to sharpen your knives. Make sure to inspect the edge for damage. Chips at the edge will require you to grind harder. An edge that is dull may need minimal grinding with a finer grinder. Test the knife by cutting through paper or rope. The knife may be able to be sharpened without the need for a sharpening tool if it has not been dulled in a while.
Common techniques for sharpening wood carving tools
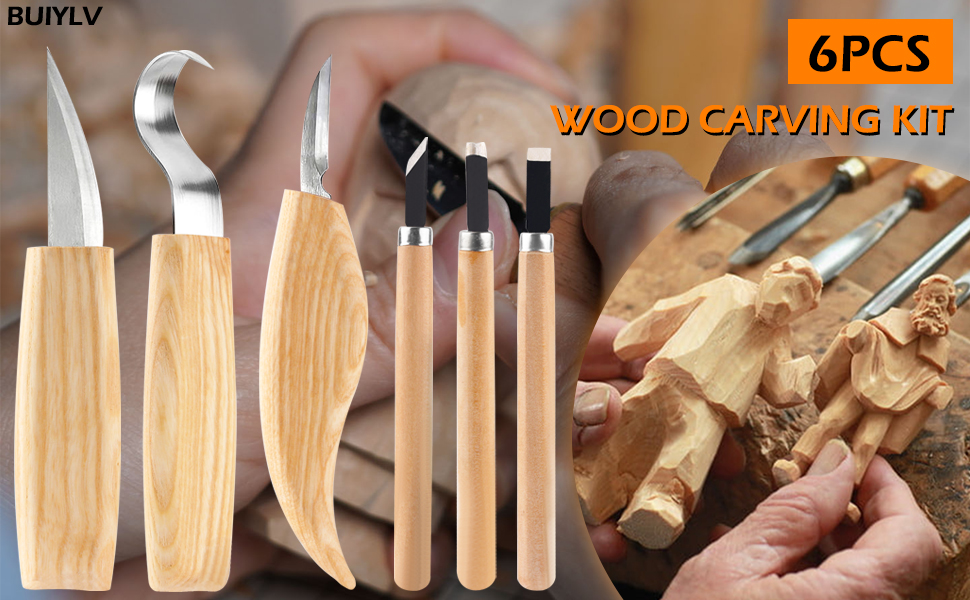
There are many options for sharpening wood carving instruments. There are several ways to sharpen wood carvings tools. To prevent metal particles from encrusting on stone surfaces, oil must be applied to oil stones. Ceramic and diamond stones don't require oil and are ideal for sharpening carbide wood carving tools. This article will talk about the common methods of sharpening wooden carving tools.
You can use a leather strop to remove the wire edge of a blade and then polish it. A leather strop can be used for any tool, but some carvers prefer a texture one. A flat leather strop works well for straight tools or the outside edge of gouges. If you're serious about your work, it might be worth investing in a leather strap with grooves.
Traditional bench chisels were sharpened at a 25 degree angle and a secondary bevel of five degrees. Modern alloys won't work well with these angles and can even cause them to corrode. To correct this, raise the angle of bevel. This requires you to exert more force and will give you less control. The same goes for block planes. They are often sharpened at an angle of 20 degrees.
Use a sharpening tool
A sharpening knife is a tool that can be used for wood carving. A stone containing grit is a mineral in crystal form. It is stronger than steel and has sharp edge. Most stones will need a lubricant in order to cut properly and prevent metal particles from embedding into it. When your tool has been sharpened to a point that is sharp, it will be easier to use it to cut wood without resistance. The strop is usually made from leather and serves to remove burr and polish the edge.
There are various types of sharpening stones available in the market. Some of them are oilstones, waterstones, and ceramic stones. Oil stones use oil as a liquid to keep fine metal particles and other contaminants from sinking into the stone. Ceramic and diamond stones do not need any lubricants. They are both useful in sharpening carbide wooden carving tools.
The Sentima sharpening stone is a great example of a quality sharpening system. Both a coarse and fine corundum stone are featured in this sharpening system. This material features a consistent grain that allows for fast cutting and smooth finishes. The unique design makes it easy-to-clean. The sharpening system is made of durable materials and will last for years without degrading in quality.
FAQ
Are there any tips for starting a woodworking enterprise?
It takes a lot of effort to start a woodworking business. However, if you are passionate about your hobby you will be willing to put in the effort. You'll enjoy the challenge and rewards of owning your own business.
When you are launching a new venture, it is important to be aware of the possibility that you will encounter unexpected difficulties. Unexpectedly, money might run out. Or maybe you'll find that customers aren't willing to pay as much as you'd hoped. To survive, you'll need to be prepared for such situations.
A good tip is to open a separate bank account for your business. You'll know exactly how much money is coming in by setting up a separate bank account.
Can you teach yourself woodworking?
You can learn everything best by doing. Woodworking takes practice, skill, patience and experience. Mastering any craft takes time.
Learning how to do something is best done by doing it. So start small and build on what you have learned from there.
How can I tell what kind of wood I am working with?
Always inspect the label when buying wood. The label should include information about the wood species and its moisture content as well as whether or not it has been treated using preservatives.
What furniture can I refinish?
Yes! You don't have to hire a professional to refinish furniture. There are many ways you can do it yourself. Here are some ideas:
Use sandpaper on the surface to remove any stains or scratches. After that, use a clean towel to wipe the surface.
Clear polyurethane varnish should be applied. Let dry completely before moving furniture around.
Use acrylic paint to paint furniture.
Instead of using paint, stain is a better choice. The stain will give the furniture a rich look.
Shellac wax is applied. Applying wax will give the wood shine and protection.
How do I choose the right tools for me?
It's important that you consider your needs and preferences while shopping for tools. Do you prefer metal handles or plastic? What size nails and screws do you usually use? Are you more comfortable using power tools than hand tools?
How much money will I need to get started?
Since every project differs, it is impossible to give exact numbers. These are the factors that will give you an idea of how much you'll need.
-
Material cost
-
Tools and equipment
-
Time spent on the project
-
The hourly rate
-
How much profit can you anticipate to make
-
Hire help
It's a good idea for beginners to start with small projects like frames and boxes. As you gain experience, more difficult projects will become possible.
How much should a woodworker charge per hour?
The hourly rate for a professional Woodworker will vary depending on many variables, such as experience, skill level and availability.
The hourly average rate for skilled woodworkers runs between $20-$50.
A woodworker with less experience may be able to charge $10 an hour.
Statistics
- If your lumber isn't as dry as you would like when you purchase it (over 22% in Glen Huey's opinion…probably over 10-15% in my opinion), then it's a good idea to let it acclimate to your workshop for a couple of weeks. (woodandshop.com)
- Most woodworkers agree that lumber moisture needs to be under 10% for building furniture. (woodandshop.com)
- The best-paid 10 percent make $76,000, while the lowest-paid 10 percent make $34,000. (zippia.com)
- Woodworkers on the lower end of that spectrum, the bottom 10% to be exact, make roughly $24,000 a year, while the top 10% makes $108,000. (zippia.com)
External Links
How To
How to make wood joint
This tutorial will show you how to join two pieces of wood together. We will use the "pockethole joint," which means that we drill holes in the wooden pieces and then glue them together. If your wood is straight and flat, this method will work well. You may want to consider other methods, such as dowel joining. Here are the steps
-
Drill Pocket Hole Joints. Start by measuring and marking the spot where the pocket hole joint will be placed. Then drill 3/4 inch deep holes into the ends of each piece of wood using a jig saw or handheld drilling machine.
-
Sand Smooth. Sanding the edges of the wood will help to prevent the joint from splitting later.
-
Glue Together. Apply glue to the sides of both wood. Allow the wood to rest for five minutes before clamping it together.
-
Attach the Pieces together. After the glue has dried thoroughly, secure the pieces so that they are flush.
-
Trim Joinery. Trimming the joinery after glue has completely dried.
To be able to turn the pieces inside-out, leave enough room between them.