
This article will help you if you have ever tried to build a table but felt intimidated by the thought of using wood. This article will walk you through the steps necessary to build a solid wood table top. It will cover Cross-grain, mortise, tenon, rounding edges, choosing a material, and mortise, tenon, joints. We'll also talk about how to measure the dimensions of the top.
Cross-grain sanding
A smooth, wipeable surface can be achieved by doing a good cross-grain sanding on a solid wooden table top. This process has its risks. Dust from the table can have an adverse effect on your air quality so make sure you work in a well-ventilated place. Each stage of the sanding must be planned in advance. The first step in sanding is to remove all existing finish. This step is the most tedious and can have a significant impact on the final look.
Before you sand, take the time to feel and examine the wood. Professionals can get away with taking shortcuts, but a novice needs to be aware of possible mistakes and avoid making them. This article will provide you with useful tips to ensure that you achieve the look and finish you're after. A flat block is best when backing sandpaper on a solid wood tabletop. A sandpaper backing block is necessary to prevent hollowing in the early wood grains.

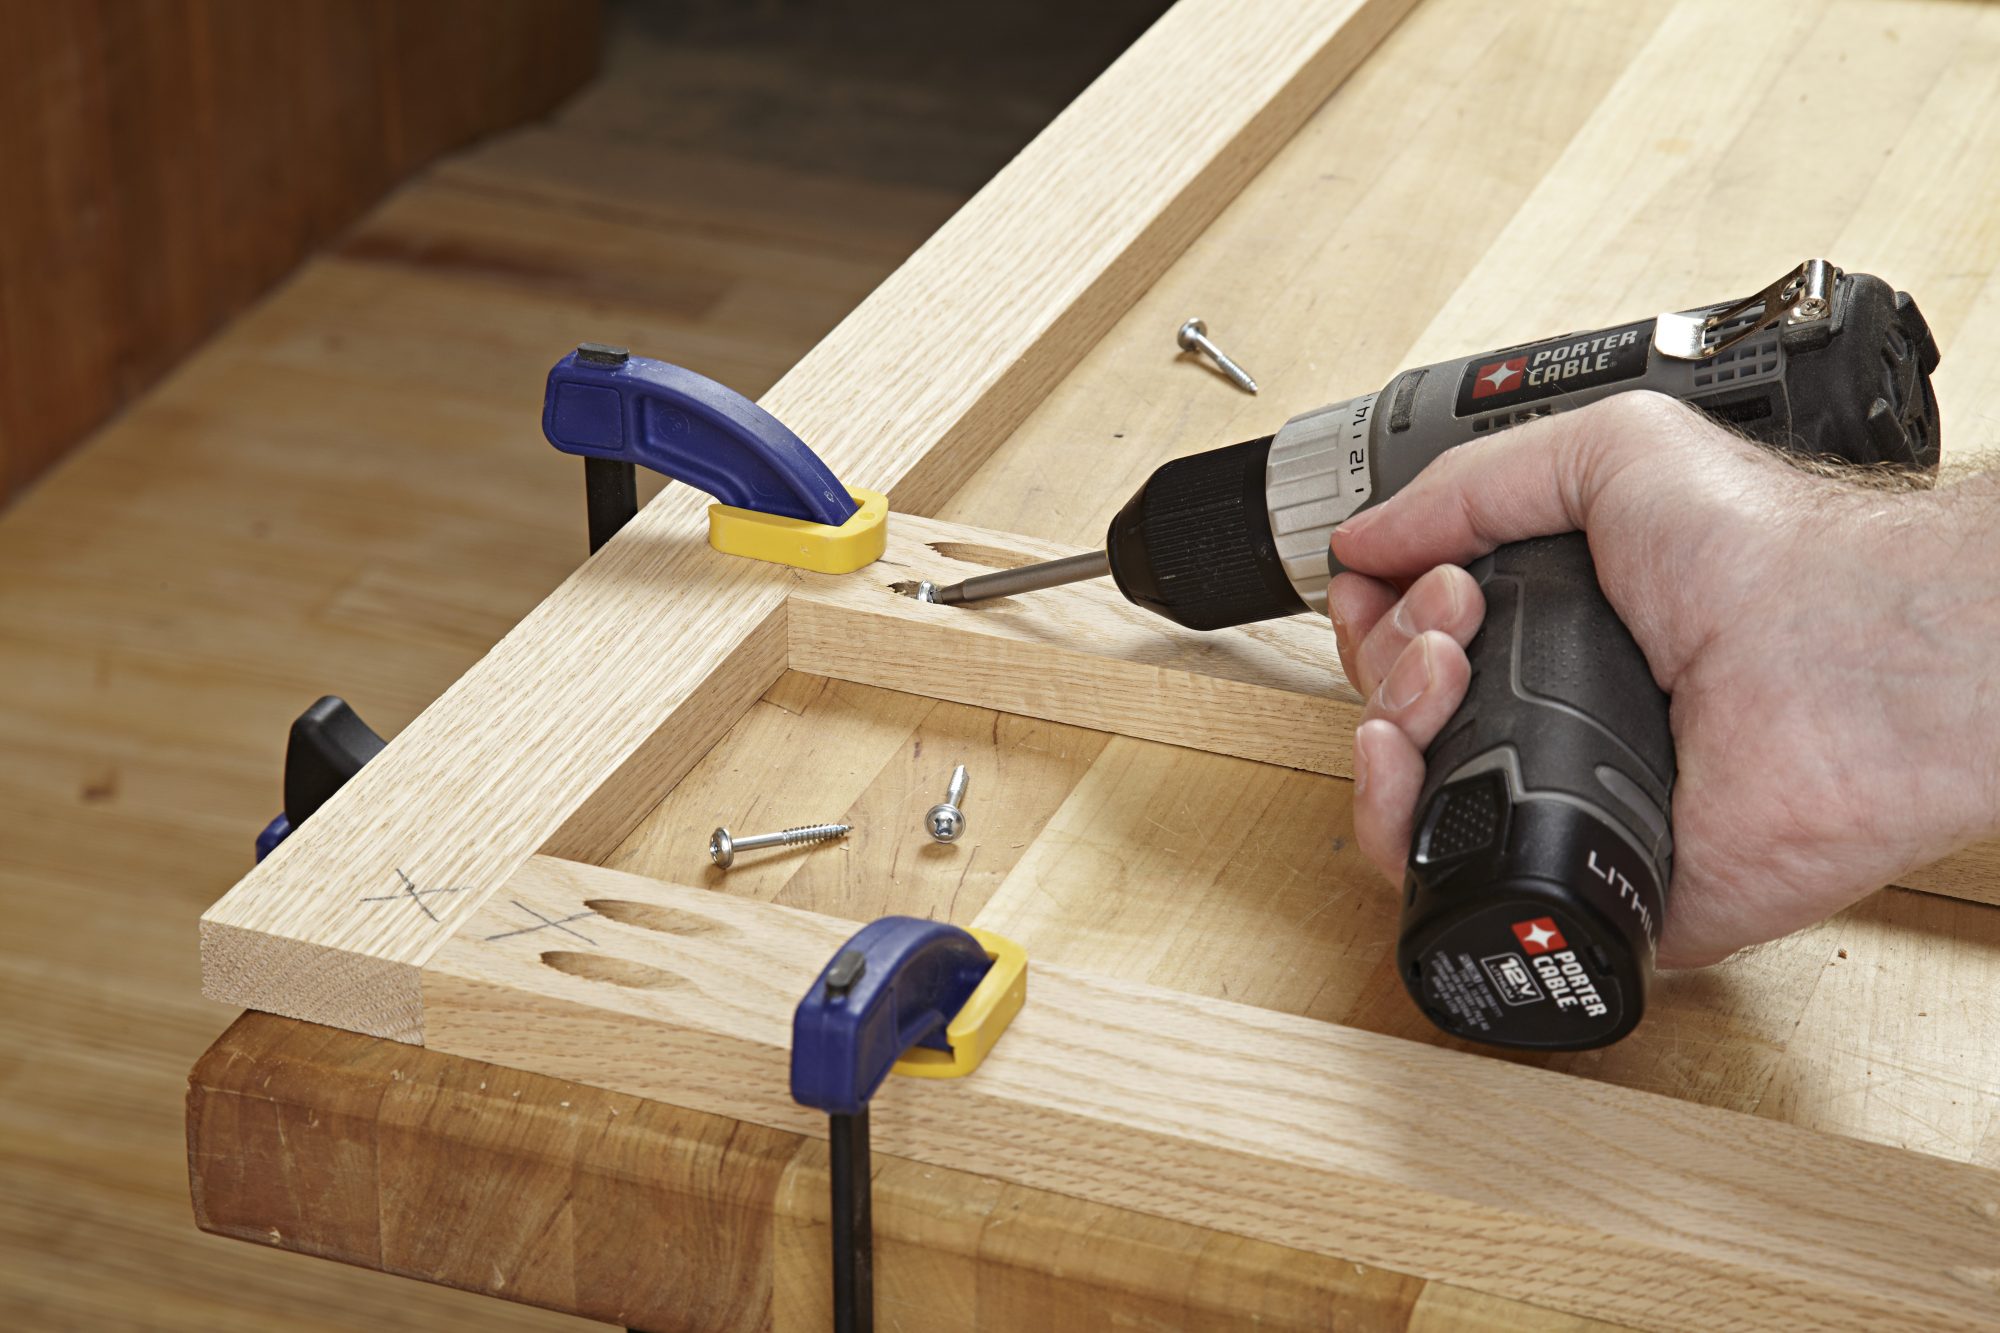
Mortise joints and tenon joints
Mortise-tenon joints are among the most versatile types. These joints are common in tabletop projects. There are however some differences. Some cases will require glue, while others may require a tight fit. It is important that the mortise and Tenon joints used to attach a solid-wood table top fit together tightly. These are some things to consider when selecting this type of woodworking joint.
The material should be three times thicker than the tenon. If your table top measures 3/4" thick, you will need a 1/4" tenon. The same applies to the apron. You must cut the top and bottom shoulders of each piece before fitting the tenon into place. To determine the exact depth, you will need to mark both the tenoning cuts and the boards.
Rounding edges
Rounding the edges of solid wooden table tops is important to ensure your table looks as beautiful as possible. Wood expands twice as fast along its grain. Therefore, rounding the edges on solid wood table tops will allow them to swell naturally and add beauty and value. Be sure to verify the recommended base size and top size for any solid wood table you decide on, regardless of whether you're buying a finished one or one that has been unfinished.
Before you attach the edging around your table top, fit the eight pieces from end to end. Take a testboard and measure the angle between straight molding ends, the tabletop edge, and adjust as necessary. If you have a tablesaw, ensure that you run the straight pieces through the router first. After the tabletop is cut out, glue and sand along the edge.
Choosing a tabletop material
Solid wood is one of the most durable tabletop materials. It is also aesthetically pleasing, and the closest imitation is made of MDF material. Solid wood tabletops are not as prone to moisture, but even the smallest cracks could become a breeding site for fungi. Extreme temperature and humidity changes can also cause wood to lose its structural integrity. It is important to consider how the table will be maintained if it is being used in a dining or kitchen area.
Oak: Oak is a beautiful wood but it's more costly than other hardwoods and takes longer to grow. Oak tabletops can last a lifetime with proper maintenance. The grain of oak is rich and varied, so it's easy to maintain. You can match the colour of your furniture or add stains to highlight the oak grain. Be sure to protect the surface from sunlight, though, as the material can be easily stained.
FAQ
Does it take a genius to make woodworking work?
No. No. Woodworking isn't rocket science. To create stunning works of art, anyone can learn to use basic power tools.
How can a novice woodworker make it big?
Many people are looking to create their own furniture and start an internet business. You don't have to sell on Etsy if your furniture is just beginning. You can sell at local craft fairs. You could also offer workshops to help others learn how to make their own furniture. If you have the experience to be a carpenter, builder, or a designer, you may consider offering your services in remodeling homes or creating custom pieces.
Do you have any tips on starting a woodworking business?
It is hard work to start a woodworking company. However, if you are passionate about your hobby you will be willing to put in the effort. Plus, you'll probably enjoy the challenge of running your own business.
One thing to keep in mind when launching a new venture is that you might encounter unexpected problems along the way. Unexpectedly, money might run out. Or you might find that your customers aren’t willing or able to pay as much you had hoped. To survive, you'll need to be prepared for such situations.
A good tip is to open a separate bank account for your business. This will ensure that you always know how much money has come in.
What amount of money do I need to get started with my business?
Because every project is unique, there aren't exact numbers. But if you want to get an idea of how much money you'll need, consider these factors:
-
Material costs
-
Tools and equipment
-
Time spent on the project
-
Hourly rate
-
What profit are you expecting to earn?
-
No matter if you are looking to hire someone
If you're just starting out, you may decide to start small by making simple items such as boxes and picture frames. As you gain experience, more difficult projects will become possible.
Where to buy Hardwood Lumber
You can buy hardwood lumber at Home Depot. They carry a variety of wood products such as flooring, cabinets, and furniture.
They also have an extensive selection of engineered hardwoods such as Ipe (Araucaria Angustifolia), Brazilian Cherry (Pau d'Arco), and Mahogany (Swietenia Macrophylla).
These woods are available online by searching Google for "hardwood lumber".
What kind wood should I use for my project?
There are many wood types that are used in woodworking, including oak, maple and birch. Every type of wood is different and can have a unique look and feel that will affect the final product. Oak, for instance, is darker and harder than most other woods. Birch is light and soft, while mahogany can be heavier and more dense. You can also choose from solid wood or veneers. Veneers are thin sheets or wood that are glued together into one layer.
Statistics
- Woodworkers on the lower end of that spectrum, the bottom 10% to be exact, make roughly $24,000 a year, while the top 10% makes $108,000. (zippia.com)
- Average lumber prices rose about 600 percent between April 2020 and May 2021. (familyhandyman.com)
- The best-paid 10 percent make $76,000, while the lowest-paid 10 percent make $34,000. (zippia.com)
- Overall employment of woodworkers is projected to grow 8 percent from 2020 to 2030, about as fast as the average for all occupations. (bls.gov)
External Links
How To
How to stain wooden surfaces
Stain wood is a process that involves applying chemicals to the surface of wood, which changes its color. This chemical reaction changes the wood's color from white to brownish. Oak is the most common wood type for staining. However, you can also use other wood types.
You can apply wood stains in many different ways. One method involves mixing the stain and a solvent and then spraying it on the wood. Others use a solution made up of water and dye, which is then applied directly onto the wood. The stain can be mixed with paints and varnishes to become part of the final coating.
Preparing your wood for staining is the first thing to do. To apply the stain, clean the wood completely. Sanding the wood smooths out rough spots and scratches. Then you must decide what kind of stain you want to use. There are two main types of stain: non-penetrating and penetrating. Penetrating stains penetrate deeper than non-penetrating stains, which makes them great for dark colors like mahogany. Non-penetrating stains work best with light colors like maple.
Once you have decided on the stain type that you want, get your tools ready. A paintbrush works well for applying stains because it allows you to spread the liquid evenly across the surface. To remove any stains left behind after painting, you will need some rags. If you plan on mixing the stain yourself make sure that you have enough containers to hold the different components.
Once you have prepared your materials, start by cleaning the area where you plan to stain the wood. To remove dirt and dust, use warm water and soap. You can wipe down the entire furniture using a damp rag with clean water. You should remove any debris, especially if your plan is to stain darker wood.
The stain should be applied next. Begin at one end and spray or brush the stain on the wood. Slowly and carefully move along the grain of wood, slowly but steadily, until you reach the other end. Keep the stain from dripping off the wood's surface. Allow the stain to dry completely before you move on to the next step.
A coat of clear polyurethane sealing agent is applied to protect the paint. Three coats of polyurethane sealing agent are required. Let the third coat dry overnight before you sand the final coat.