What are the parts of a pen? A pen is useful for drawing and writing. This article will cover the components of a pen. It includes its Ink chamber and Thrust device. Corner and smooth points are also covered. You'll be able use these parts efficiently and effectively when you have a good understanding of them. This article provides tips on how your tool can be maintained and repaired. It is a good idea having a reference for when you create or repair a pen.
Ink chamber
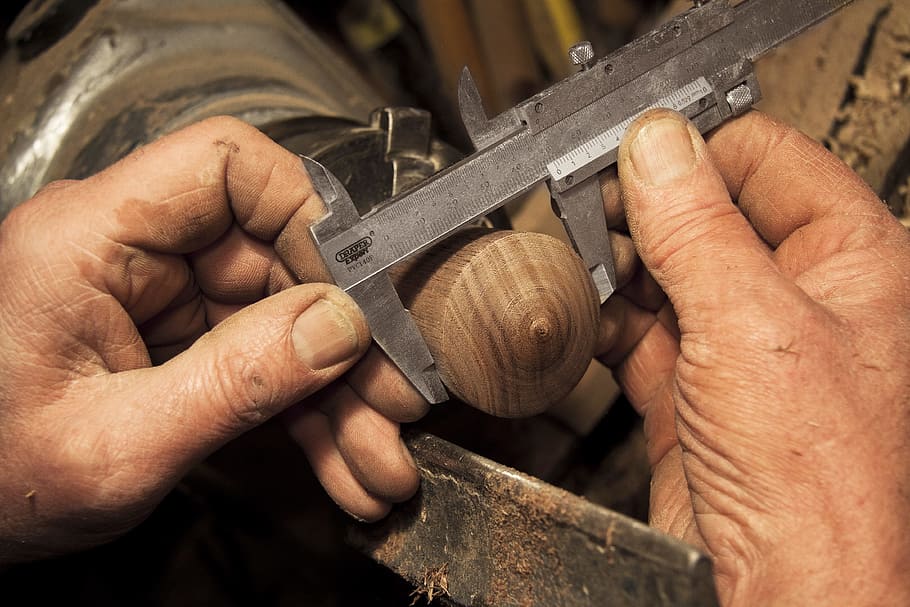
How much ink should a pen have in its ink chamber? The ink should have no particles or thickness. It should also be dry enough to transfer to paper. The entire process should not take more than 2.1 minutes. This must all be done carefully. These are some tips to help you make ink pen. Read on to learn how to produce a high-quality pen. To help you create the perfect pen, we have put together a guide!
An outside company supplies the tungsten-carbid balls and the plunger to make the pen body. Other components are made using different molds. The pen body, and the point are made from brass. Brass disks are heated to soften them. Then they are placed in a chamber for compression and shaped. The die cast mold is then used to push the metal disk through a die casting mold. Then, the ejector plunger pushes out the excess brass.
Thrust device
The Thrust device to tools pens is a high-performance serial interface that creates and manipulates vector data. Two types of data are supported by the device: pointer and vector. Vector data can also be used to plot and calculate graphs. Vector data can be stored either in the host or in the device's memory. You can also use the device to perform data transformations.

The thrust device measures 2cm in length and is made of plastic. The thrust tube holds the ink chamber. Once the thrust tube is freed, the ink chamber will be released. The metal clip on the pen allows it attach to thin objects. The pen's mechanisms are all held within the 12-cm-long case. It also provides a firm grip for the user. This makes it easy to hold the pen in your hand without it becoming loose.
Corner and smooth areas
Corner and smooth anchor points can be used in Photoshop to distinguish between the two types. Smooth anchors create a curved transition. Smooth anchor points can be angled or rounded to create sinuous or snaky transitions. Both types can be made with the pen tool. To switch between them, press the arrow key on your keyboard or the Command button on MacOS. Once you have selected the anchorpoint, you can change its properties.
The curved-corner anchor point, or cusp point, is the intersection of two line segments. It may look like a double-ended fishhook. It's used for lowercase letters like ms and Valentine hearts. A combination-corner anchor points can be used to create rounded corner rectangles. It is easier to use the curved-corner Anchor Point than the straight-corner Anchor Point.
Anchor points
You need an anchor point in order to draw a straight line when using a tool. The pen tool can detect this and will automatically draw straight lines if you specify. Connecting two anchor points allows you to create shapes that have sharp corners or sides. If you're not sure how to connect these points, hold shift while clicking. You can set anchor points at the correct angles if you hold shift while clicking. This will make it easier for you to draw straight edges.
Once you have selected an anchor point you can click and drag the item to create a path. You can either delete or move the anchor points to another location. You can also use the Pen tool to add anchor points or modify paths. The Pen tool can add corner and curve points, and you can also use the Direct Selection tool to select multiple objects. Anchor points are a powerful tool for the Illustrator environment. They are invaluable for creating curves and lines with precise lines.
Widget for pen elements
Widgets for tools pen elements provide access to many functions and options. Teachers can edit captions, add images or change text size. Teachers can also drag a box onto a canvas and change its size. The tool can be modified by changing the colours. There are two types of tools in the Widget: the text tool and the image uploader. The text tool allows you to enter text on a canvas, while the image uploader allows you to add a photograph to your lesson. To add depth and dimension to your lesson, images can be scaled and rotated.
The Pen Tool comes in many forms, depending on what you are doing. The cursor indicates the action that is about to occur. You can switch the tool to limit movements to 45 degrees or 90 degrees, 135 degree, 180 degrees, and 135 degree respectively. Direct Selection Tool, however, removes adjacent path segments. Additionally, the Pen Tool option allows you to switch to Convert Anchor Point Tool.
FAQ
How much do hobbyists need to invest in starting a business?
It is likely that you will need some capital in order to buy the required tools and supplies if your goal is to open your own woodworking business. It's a good idea to buy a small tablesaw, drill press and circular saw. These items won't break the budget and aren't expensive.
Can this be a way to make money?
Yes! Many woodworkers are already doing so. According to the U.S. Bureau of Labor Statistics, the median annual woodworker wage was $34,000 in May 2012. This is more than the national average of 31,000 per annum.
How do I choose the right tools for me?
It is important to consider your needs and preferences when shopping for tools. Are you more comfortable with plastic or metal handles? What size nails and screws do you usually use? Would you rather use hand tools than power tools?
How can a woodworker start making money?
Many people want to open an online furniture business and are learning how to build it. However, if you're just getting into furniture building, there are other options than selling on Etsy. You could sell at craft fairs or local events. For those who want to build their own furniture, you might offer workshops. If you have the experience to be a carpenter, builder, or a designer, you may consider offering your services in remodeling homes or creating custom pieces.
Are you a genius in order to master woodworking?
No. It is not rocket science to woodwork. Anyone can learn how to use basic power tools and techniques to create beautiful works of art.
Do you know anything more about woodworking?
Furniture making is a laborious task. It's easy not to appreciate how hard it is. The hardest part of the process is actually finding the right wood. It can be hard to choose from the many types of wood that are available.
Another problem is that not all wood has uniform properties. Some woods will warp over time, others will split or crack. These things should be considered before you buy wood.
Statistics
- Average lumber prices rose about 600 percent between April 2020 and May 2021. (familyhandyman.com)
- The U.S. Bureau of Labor Statistics (BLS) estimates that the number of jobs for woodworkers will decline by 4% between 2019 and 2029. (indeed.com)
- Most woodworkers agree that lumber moisture needs to be under 10% for building furniture. (woodandshop.com)
- The best-paid 10 percent make $76,000, while the lowest-paid 10 percent make $34,000. (zippia.com)
External Links
How To
How to stain wooden surfaces
The process of staining wood involves the application of chemicals to the wood's surface, which causes it to change its color. This chemical reaction causes the wood to change from white to brownish red. The most common type of wood used for staining is oak, although many other types of wood can be stained.
There are many options for applying stains to wood surfaces. Some methods include mixing the stain along with a solvent like turpentine and then applying the mixture to the wood by brushing or spraying. Others use a solution made up of water and dye, which is then applied directly onto the wood. The stain can be mixed with paints and varnishes to become part of the final coating.
Preparing the surface is the most important step in staining wooden surfaces. To apply the stain, clean the wood completely. Sanding the wood smooths out rough spots and scratches. Then you must decide what kind of stain you want to use. There are two types of stains that can be used: penetrating and non-penetrating. Penetrating colors penetrate deeper into wood than those that are non-penetrating. This makes them more suitable for darker colors, such as mahogany. Penetrating stains are best paired with lighter colors, such as maple.
You will need to decide on the type of stain you want to use, and then prepare your tools. Paintbrushes are great for applying stain because they allow you to evenly spread the liquid across the surface. After you're done painting, make sure to have some rags handy to remove any excess stain. If you intend to mix the stain yourself you will need enough containers to hold all the components.
After you have prepared your materials, clean the area you intend to stain. Clean the area with soap and warm water to get rid of dirt and grime. You can wipe down the entire furniture using a damp rag with clean water. If you intend to stain darker wood, make sure you get rid of any debris.
Apply the stain. Start at one end of the piece of furniture and brush or spray the stain onto the wood. You should work slowly and carefully. Continue moving along the grain until you reach your opposite end. Be careful not to let the stain drip off the wood's edge. Before you proceed with the next steps, let the stain dry completely.
Protect the painted surface with a coat polyurethane paint sealant. Apply three coats polyurethane sealer. Allow the third coat to dry overnight before sanding the final coat.