To cut undercuts with the spindle, use the woodturning tool ring. Use this tool to make undercuts on the spindle. Don't pull away from the cutting edge too fast, as this could break the ring. The inner side of the bead can be sanded before the spindle separates. To make undercuts on your spindle, it is a good idea to use the captive-ring tool.
Termite tool
The Termite Tool for Woodturning is a ring-shaped cutter that hollows end grains quickly. Its name refers to the smoothness of its cut. This tool requires only minimal sanding. The Termite tool is particularly useful for hollowing goblets or hollow vessels, including boxes and boxes. You can also use this tool to make bowls and vessels.
The Termite tools' ring-shaped cutting edges create shear cuts in any material. Termites are great for hollowing small boxes, without drilling holes. The termite's ability to pick up a cut at the right place, unlike a grinder, allows it to produce flat bottoms or slightly concave ones. You must first expose the cutting edge to the material before you can use the Termite tools. The wood drive can catch onto the termite instrument if it is not presented first.
Hercules
The Hercules woodturning-ring-tool is versatile and heavy-duty. It can be used to make intricate bowls and pen forms. It's 3/8" round #3 Hunter Carbide Cutter, and 5/8 inch square shank make it ideal for rough turning and finishing. The lathe's tool support and ways absorb impact from the wooden turning tool. However, the lathe provides a smooth touch that makes final finishing cuts much easier.
Hercules also provides a complete woodturning-ring-tool set, which includes a power drilling rig, a rotary drill, and a standard charge. This tool kit can be ordered online for $25 or $130 in-store. The bundle price is also good if you're shopping outside the holiday season. The quality of Hercules tools is higher than that of some competitors', so you'll save money in the long run.
Osprey
Osprey's woodturning tool ring-tool gives you a nice finish on your bowls. This tool is made with #2 Hunter Carbide Butter and fabricated on a 1/2" round shank. It is excellent for making fine finish cuts, but you can also use it for basic turning tasks. If you're in the market for a new gouge, you'll love this one.
Osprey's woodturning ring-tool includes a drill. This versatile tool is compatible with both a corded and a drill press. For precise drilling, the drill-bit can be crucial. But, beginners can do fine with a Forstner little. A larger blank can be purchased to drill the first few rings if you are a beginner.
Robert Larson
If you're considering getting a woodturning ring tool, there are many options out there. While some prefer to have a hand-made tool while others prefer a computer-generated model, there are many options. The Robert Larson Co Gouge Slip is a great tool for beginners. It's inexpensive and comes equipped with hardened brass pins and plates. Two pins are included for marking joints. One pin is for standard marking. Both of these are excellent choices, although you may not need all of the pins and gauges available.
Benjamin's Best
You've probably seen advertisements for the Benjamin's Best woodturning ring tools. What is the real difference in these tools from the rest? They aren't the same. Benjamin's Best woodturning rings tool has eight pieces. Each one is designed for a specific purpose. The ring can be used for smooth and even turning surfaces. It has a durable black coating.
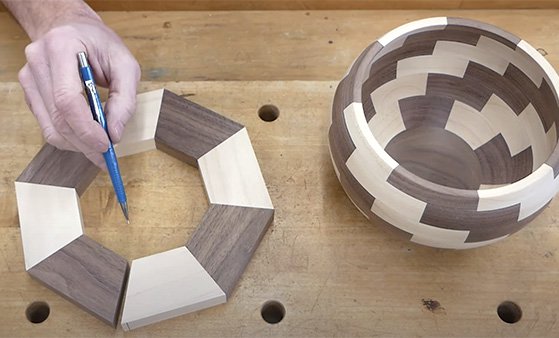
The ring-tool comes with a captive ring, unlike other woodturning tool. These rings may be decorative or functional depending on their design. These rings can be used as puzzle pieces by non-turners. Many spindle turnings are done with captive rings. This includes baby rattles as well as crochet hook rings and honey dipper ring. However, all of these pieces can easily be made using the ring instrument.
CROWN
CROWN woodturning rings are versatile tools for hollowing thin-walled pieces of wet-wood. The dual-bevel "High Speed Steel", ring provides an exceptional finish for hollowing into the end grains. It can work with both flat and curved surfaces. It is an excellent value for money. The handle is stained beech and can be used for many tasks.
CROWN Woodturning Ring Tool is handmade in Sheffield, England. Made from cryogenic steel of the highest quality. With its double bevel, the user can cut from either the left or the right side of this ring. Its precisely ground edge will not lose its sharpness even after many years of professional use. This is due to the fact that it has been meticulously polished and ground inside. This tool also comes with a lifetime warranty. Crown's tools have been designed to last and are indispensable for woodturners.
FAQ
Which woods are good to use for furniture-making?
Woods are classified according to their hardness. Softwoods can be pine, fir or cedar. Because they are resistant, they can be used for outdoor furniture. You can find hardwoods like oak, maple, mahogany, teak, and others. Because they are not weather-resistant, they are best used indoors.
Is it possible to open my own woodworking shop?
It can be difficult to start your woodworking business. You will need to adhere to many legal requirements. You don't have to go through all that hassle of setting it up. Many people join already-established businesses. This will allow you to avoid paying membership fees and taxes.
What else should I know about woodworking in general?
It's easy to underestimate the amount of work involved in making furniture. Finding the right kind of wood is the most difficult part. It can be hard to choose from the many types of wood that are available.
Another issue is that wood does not have the same properties. Some woods will crack or warp with time. Others will split or crack. These factors should be taken into account before buying wood.
Statistics
- In 2014, there were just over 237,000 jobs for all woodworkers, with other wood product manufacturing employing 23 percent; wood kitchen cabinets and countertop manufacturing employing 21 percent. (theartcareerproject.com)
- If your lumber isn't as dry as you would like when you purchase it (over 22% in Glen Huey's opinion…probably over 10-15% in my opinion), then it's a good idea to let it acclimate to your workshop for a couple of weeks. (woodandshop.com)
- The best-paid 10 percent make $76,000, while the lowest-paid 10 percent make $34,000. (zippia.com)
- Average lumber prices rose about 600 percent between April 2020 and May 2021. (familyhandyman.com)
External Links
How To
Here are some tips on how to drive nails in wood
It is essential to pick the right size and style of hammer before you can drive a nail in wood. There are many types of hammers that you will find: claw hammers and sledgehammers; mallets; ball peen hammers; and hatchets. Each kind of hammer has its own advantages and disadvantages. A claw hammer works well when you're trying to hit nails with a heavy hammer. However it is difficult to precisely control where the blow hits. A sledgehammer is great for hitting large areas at once, but it's too heavy to use effectively for smaller tasks.
After you've chosen the right tool, hold your hand flat to the handle so it rests comfortably in one of your palms. Grip the handle firmly, but don't squeeze it so tightly that you hurt yourself. Hold the hammer straight up, keeping your wrist relaxed. Next, swing the hammer toward the ground and aim for the nail's center. The impact of the hammer hitting the nail should be felt. Practice swinging your hammer on a block of wooden until you feel comfortable.
Hold the hammer near your body until you're ready for the nail to be driven. You will need to position the nail so it is parallel to the wood. Keep your eyes focused directly on the tip of the nail. Then, swing the hammer forward. Next, follow the motion of your hammerhead. Repeat this action several times, gradually increasing the speed of the swing. Try adding power to your swings when you've mastered the technique. To make it more powerful, hold the hammer up high to your shoulder and then bring it down. This will help you put more energy behind each of your moves.
Once you've nailed the first hole, remove the hammer from the nail. The rest of the nails can be pulled out using a screwdriver, pry bar, or a hammer. You should ensure that the nails are flush with the board's surface to avoid splitting the wood.