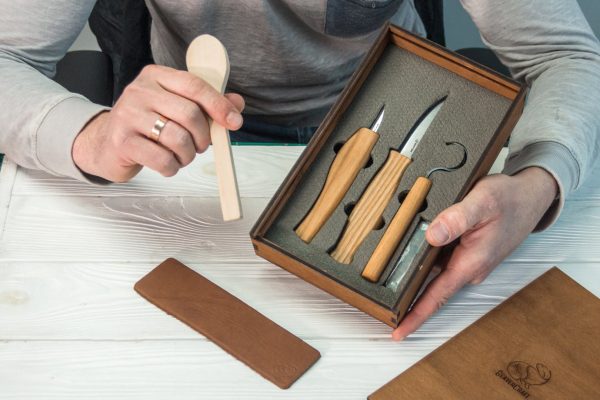
If you're a beginner woodcarver, you might not be sure where to begin. Here are some tips for your first woodcarving project.
Dog
A lot of free woodcarving patterns are available online for aspiring woodcarvers. These patterns will guide your carving of your dog in a variety styles and dimensions. These are the tools you will need for carving your dog. You will need a band saw or coping saw, chisels, a mallet, and some time to sharpen. Next, you will be ready for carving!
Eagle
Native Americans see the bald-eagle as a symbol of strength and courage. Its primary purpose was to be the creator's messenger. It measures approximately 20 inches in size and 5 inches wide. Wood carvings of the eagle are very popular today. There are many options for carving eagles from antique to modern woods. This article will show you some of the most common wood carving styles.
Bear
Carving a bear in wood is an easy project. It has several distinguishing lines and shapes. Each line has an additional weight. For extra visual interest, the front paws of bears are angled towards the legs to add interest. If you're new to wood carving, consider purchasing a book that teaches beginners how to create a bear. James Miller's book describes the entire process.
Elephant
An elephant wood carver is a beautiful way to give your home character. 1stDibs offers 56 antique carved wood elephants, as well as two modern pieces. These pieces have been produced as far back as the 19th century, and have become increasingly popular in recent years. You have the option to choose from Art Deco or Mid-Century Modern styles. Or, you can pick a smaller piece that will add a subtle touch of elegance to your home.
Moose
A moose is a great wood carving animal to try, whether you want to add antlers or just create a beautiful moose head. Dowels can hold moose antlers or paddles. Push them in, or glue them in. You can then paint the moose using a walnut gel stain, or you can use paint to color it.
Template for Moose
Carvers can use a moose carving template to help them create realistic-looking carvings. You can color moose carvings with paints or stained them with walnut gel stain. This animal is very easy to carve once you know the basics. Add details such as fur and eyes using a brush or a die grinder's typhoon bits. This template is great for beginning wood carvers who wish to carve an animal.
Bear template
To begin a bear wood carving, you'll need a template. Then, use a Dremel tool to explore the wood features. Stop cuts can then be used to separate the legs of the lower body with this tool. To mark the location of splits, you can also make small V cuts in the legs. After completing the ear and leg parts, you can round the underbelly. To continue shaping the bear, leave a space at the back.
Eagle template
To carve an eagle, you will need three detailed templates. One template will be used to carve the eagle. The other template will be used for working on paper and can then be cut to make patterns. The third template serves as a guide. Next, you'll use the tools provided to cut out main lines. Be sure to cut the lines as close as possible with the pattern line. Make sure that all of the marks are aligned.
Mouse template
If you're new to wood carving, you'll find that there are several different designs to choose from. This will make the task easier. There are printable patterns that can help you. If you're just starting out, you could start with a simple geometric pattern. As you get more experience, you can start with simpler patterns. Once you know the basics, the rest will come easy.
FAQ
Where to buy Hardwood Lumber
Home Depot offers hardwood lumber. You will find a range of wood products available at Home Depot.
They also have an extensive selection of engineered hardwoods such as Ipe (Araucaria Angustifolia), Brazilian Cherry (Pau d'Arco), and Mahogany (Swietenia Macrophylla).
These woods are available online by searching Google for "hardwood lumber".
What are the basics of woodworking?
A great way to start learning how to build furniture is by building a simple bench for yourself. This project can be completed with whatever wood you have available at home. You don't need to know which type of wood you should use. Instead, get some pine boards at Lowes or Home Depot. After building your bench, sand off any rough edges and apply a stain or varnish.
What is the minimum investment a hobbyist needs to make in order to get started?
To start your own woodworking company, you will likely need capital to purchase the necessary tools and other supplies. You can start by purchasing a small table saw and drill press as well as a circular saw, circular saw, jigsaw and sanding machines. These items don't cost much so they won't break your budget.
What time does it take for furniture to be finished?
It all depends on how large the furniture is. Boxes and picture frames are small projects that can be completed in one day. Larger projects like tables and desks take many days. It takes time to properly stain and seal wood.
What is the difference between a hobbyist woodworker and a professional woodworker.
Hobbyists enjoy making things out of wood, whereas professionals focus more on the quality of their work. Hobbyists are proud of their creations and will often share them with family members and friends. Professionals will spend hours researching designs and then begin to create a project. Professionals will be meticulous about all aspects of their work, from selecting the right materials to finishing it.
Statistics
- The best-paid 10 percent make $76,000, while the lowest-paid 10 percent make $34,000. (zippia.com)
- Woodworkers on the lower end of that spectrum, the bottom 10% to be exact, make roughly $24,000 a year, while the top 10% makes $108,000. (zippia.com)
- Average lumber prices rose about 600 percent between April 2020 and May 2021. (familyhandyman.com)
- Overall employment of woodworkers is projected to grow 8 percent from 2020 to 2030, about as fast as the average for all occupations. (bls.gov)
External Links
How To
Here are some tips on how to drive nails in wood
The first step in driving a nail into wood is to choose the correct size and type of hammer. The most common types of hammers are claw hammers, sledgehammers, mallets, ball peen hammers, and hatchets. Each kind of hammer has its own advantages and disadvantages. A clawhammer works best when hitting something hard like nails. However, it can sometimes be difficult to see exactly where the strike is going. A sledgehammer is great for hitting large areas at once, but it's too heavy to use effectively for smaller tasks.
After choosing the right hammer, place your hand flat against the side of the head so that the handle rests comfortably in your palm. You can grip the handle with your fingers, but not so tight that it causes injury. Your wrist should be relaxed while you hold the hammer straight upwards. Now, move the hammer towards the center of the nail by swinging it back. You should feel the impact of your hammer hitting the nail. Try practicing with a block to help you master the art of swinging a stick.
When you're ready to start driving the nail, hold the hammer in front of you close to your body. Position the nail, so it's perpendicular to the surface of the wood. Your eyes should be focused on the nail's tip. Swing the hammer forward, then follow through with the motion of the hammerhead. Repeat this action several times, gradually increasing the speed of the swing. Try adding power to your swings when you've mastered the technique. Then, raise the hammer from your shoulder to bring it down. This will allow you to exert more energy.
After you have nailed the hole, take the hammer off the nail. To remove the remainder of the nails, you can use a screwdriver/pry bar. To prevent splitting the wood, ensure you keep the nail heads flush against the board's surface.